With cannabis legalization quickly becoming a reality for more states and countries, we are potentially entering a golden age of (legal) cannabis cultivation across the country. And really, nothing quite compares to growing your own marijuana, which not only means you’ll know where your weed came from and how it was grown, but you’ll always be able to ensure that you have your own supply – and at pennies to the dollar of what you’d pay at the dispensary.
➤ Easily grow your own cannabis at home. All you need is seeds.
While many might be afraid to try to grow their own marijuana because it seems difficult, we’ll explain everything you need for a successful first grow – with no background in gardening necessary. First things first though, let’s look at the basics.
What do cannabis plants need to thrive?
Like any plant, cannabis needs a number of basic essentials – light, air, water, and nutrients, as well as a place and method of growing the plant, and careful regulation of the temperature.
Light
Cannabis plants need light to grow, and if you live somewhere with a sunny, Mediterranean climate, then you’re in luck – you can grow outdoors under the abundant sunshine, with no need for electricity or grow lights. On the other hand, grow lights allow you to completely control how many hours of sun the plants receive, without ever having to worry about an overcast day. On the other hand, no artificial light can quite match the spectrum of the sun, and outdoor grows tend to have higher yields than indoor operations.
Oxygen and Airflow
Cannabis needs oxygen just like any plant, but it’s a bit more complicated than that. Plants naturally produce oxygen and through what is known as respiration, they convert the sugars they create during photosynthesis into energy for the entire plant. For growers though, the most important thing to keep an eye on is airflow. Fresh, oxygen-rich, circulating air is essential for healthy cannabis plants, especially if you’re growing in a closed indoor space.
In addition to making sure the plants have enough oxygen, air circulation helps state off problems like bud rot, mold, pests, and mildew, which thrive in environments with humidity and stale air and can spell ruin for your cannabis garden. An air circulation system is a must even if it entails just a couple of well-placed fans and/or a simple exhaust system. You can also boost circulation by making sure to prune the extra fan leaves, especially the lower leaves around the base of the plant.
Water
Plants (obviously) need water, and this is certainly true for cannabis, which can be an especially thirsty plant. Water is essential for photosynthesis and the absorption of nutrients and minerals, so making sure to water well can make all the difference – though both overwatering and underwatering can ruin your plant. The amount of water may depend on the cannabis strain in question, and if growing outdoors, the climate and the soil will determine how much watering is needed. Indoors you can exercise full control over watering and drainage, though it still requires a fair amount of guesswork.
When determining how much water to give your plants, take a finger and stick it a couple of inches into the soil. If it’s still dry, the plants need some more water. You can also check the leaves – if they look droopy or there’s a bit of a yellowish hue, then they probably need more water.
Temperature
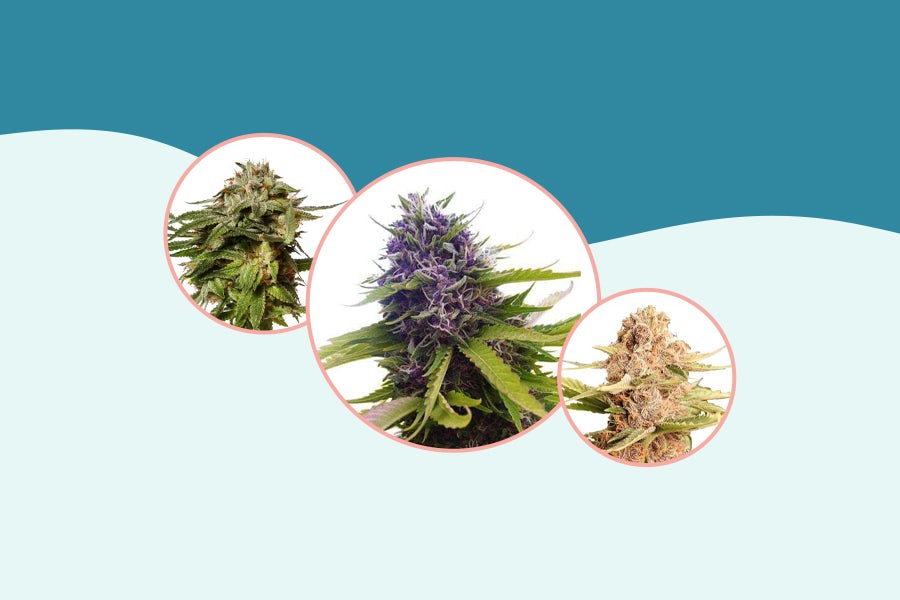
Like with watering, the right temperature for cannabis plants is a bit of a balancing act – not too warm and not too cool, with just the right amount of humidity. For the most part, cannabis plants in the vegetative state thrive in temperatures between 70-85 degrees Fahrenheit during the daytime and a slightly cooler temperature of 65-80 Fahrenheit in the flowering stage. Depending on the strain, dropping the temperature during the flowering stage can also help bring out the colors of the flowers, in particular for cannabis chemovars with purple hues.
Nutrients for cannabis
While cannabis plants have thrived for eons in the wild without the need for any additives, using the right nutrients can help optimize your grow. Cannabis draws many of its mineral nutrients naturally from the soil, and the three most important nutrients are nitrogen, phosphorus, and potassium. These make up what is known as the “NPK ratio,” which corresponds to the levels of each mineral. For instance, if you buy a fertilizer with a 10-10-10 NPK ratio, this means it will be 10% nitrogen, 10% phosphorus, and 10% potassium (K).
Other key nutrients include calcium and magnesium. During the vegetative stage, you’ll want a high nitrogen, general-purpose nutrient formula, and a low nitrogen formula during the flowering stage. Also, you will want to make sure that the nutrient you are using is suited to your growing environment – be it hydro, soil, or soilless.
How long does it take to get my first yield?
How long you’ll need to wait until you can harvest, dry, and cure your first cannabis grow depends on a variety of factors including the temperature, light, nutrients, grow method and the particular strain and seeds used.
At the least though, you should expect to wait around 9 weeks to get from seed to joint. With indoor grows the flowering time tends to be shorter because you can exert more control over the light and the overall conditions.
In addition, if time is of the essence, auto-flowering seeds can be your best bet. They can have a flowering time as short as around 6 weeks, though they tend to have a lower yield as well.
Outdoor grows can take significantly longer, especially with many sativa/haze strains, so you may want to factor in at least three months for growing, harvesting, and curing your buds. With outdoor grows, the plant typically begins to flower when summer shifts to autumn and the days become shorter. With indoor grows, you can trigger flowering by reducing the number of light hours per day to mimic this seasonal shift. Some growers do this by halving the number of light hours, while others taper off the hours gradually over the course of a few weeks.
Common beginner mistakes to avoid
No one is born with a green thumb, and there is a learning curve of sorts to growing cannabis, so don’t be surprised if everything doesn’t go off without a hitch. Nonetheless, by avoiding some simple rookie mistakes, you can make things easier on yourself – and your cannabis garden.
1. Experimenting and fiddling with your plant too much
Improv is great for jazz, stand-up comedy, even for parenting, but not so much for gardening. If you’re new to cannabis growing, don’t try a bunch of new methods and experiments that you think could help hurry along the grow. Make sure to research each step you take beforehand and stay on the marked hiking trails.
2. Trying to rush the process
Three months can seem like a long time, especially when you’re eager to try out your own homegrown weed. But by cutting corners, you can potentially make some big mistakes and harm your plant. Stick to the time-honored methods for cannabis cultivation, and follow every stoep methodically, in order, one after another.
3. It never hurts to ask!
In case you haven’t noticed, there are countless marijuana growing forums and educational resources online (like this one). There is no reason to feel that you have to go it alone, so if you have any questions take some time to do some research and don’t be shy to ask for help – the buds you save could be your own.
How to Grow Cannabis – Step-by-Step
Step 1: Choose your growing environment
First things first, you’re going to have to make the fateful decision – indoor or outdoor. Each has its pros and cons, and there is no one right answer for every grower.
With indoor grows, you can shield your grow from the neighbors and fully control the conditions from a closed, discrete environment of your choosing. An indoor grow can be carried out in a large space such as a basement, or even just in a closet or a grow box, the only issue is how much you want to grow and how much equipment and electricity you can afford. Indoor grows typically have a smaller yield, but the buds are often more (close to) perfect because of the control you can exert on the growing conditions.
On the other hand, indoor grows require you to be responsible for everything the plant needs, in particular the lighting, but also water, temperature, and airflow. The strength of the lights you use will also affect the temperature, so you’ll need to strike that careful balance between the need for light and making sure things don’t get too hot in there.
Depending on the climate and the laws where you live, you may prefer to try an outdoor grow. Growing outdoors doesn’t require any initial investment in lighting or ventilation, and outdoor grows tend to produce higher yields.
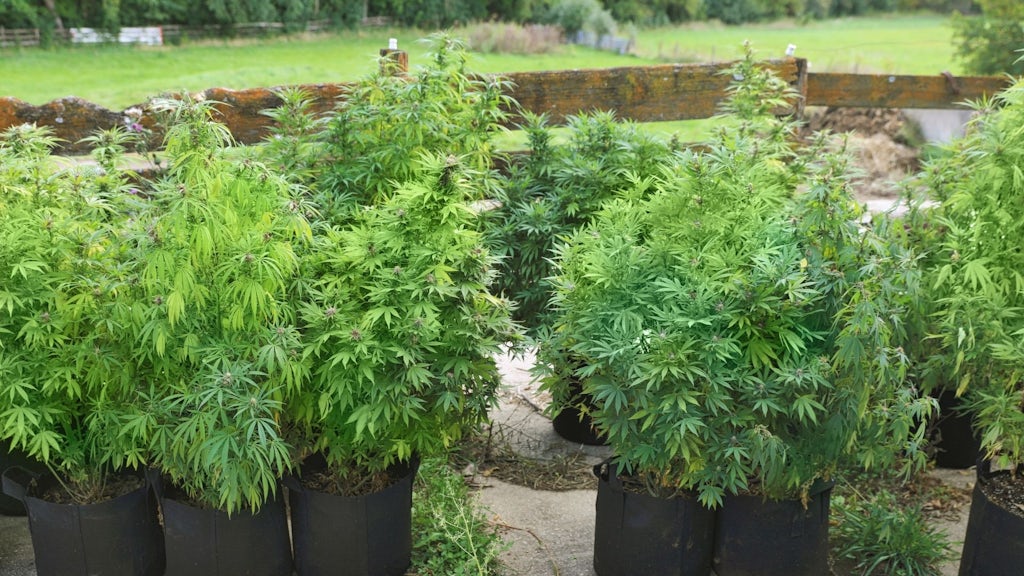
On the other hand – outdoor grows create their own problems. You are reliant on the climate, which can potentially be too dry or too wet for your plants. If the weather is too hot or too cold it can also doom your cannabis plants, and require the use of special measures such as a greenhouse.
Outdoor grows also leave your plants exposed to animals and pests, and if not secured properly, they can be targeted by thieves. In addition, while an indoor grow can cycle through multiple harvests in a single year, with an outdoor grow you will only be able to have one harvest per year.
In a sense, a greenhouse grow can be the best of both worlds. It allows you to control the grow environment while also benefiting from the free lighting provided by the sun. If you have the outdoor room and the budget, you may want to consider setting up a small greenhouse for your cannabis garden.
Step 2: Choose your cannabis grow lights
First things first, no discussion of the merits of various artificial light sources would be complete without paying proper due to the reason we’re all here – the sun.
Sunlight
With all due respect to modern science, grow lights can’t quite match the full spectrum of lighting provided by the sun. This is one reason that outdoor grows can produce larger yields. In addition, growing cannabis under the sun is far more eco-friendly and economical. However, with sunlight/outdoor grows, you will need to figure out where to position your plants so they’ll get the maximum amount of sunlight hours during the day, and you will still be at the mercy of the elements, as well as animals, pests, and potential thieves.
Compact Fluorescent Light Bulbs (CFLs) & Household LEDs
This is arguably a long way to say “the lightbulbs you probably use at home.” They produce the same power as professional grow lights, but they are far cheaper and can work great for a small grow operation, especially in a space bucket, a small grow box, or a small closet. While these lights are cheap, you’ll need a lot (~100w per sq/ft) and you’ll need two sets of lights. One with 6500k for the vegetative stage and 2700k for the flowering stage.
Fluorescent Lighting
Fluorescent tube lights are popular for indoor grows during the vegetative stage, when the plants need less light. These lights must also be kept very close to the top of the plants in order to provide the light they need. The good news is that these lights don’t use a lot of electricity, they don’t produce a lot of heat, and they can be kept very close to the plants without burning them.
Metal Halide (MH) & High-Pressure Sodium (HPS)
Metal Halide (MH) and High-Pressure Sodium (HPS) lights are two types of High-Intensity Discharge (HID) grow lights. Using a combination of the two lights can help ensure a high yield indoor grow, without much care or maintenance. Because of the higher price and heat they produce, HID lights like these are arguably better-suited to larger grow operations. In addition, because of the high heat, they need to be kept pretty high above the plants, and you will need to figure out an exhaust system of some sort.
- Mid-grade: 600w MH/HID Kit (80w per sq/ft)
- High-grade: 1000w MH/HPS Kit (62.5w per sq/ft)
LED grow lights
LED grow lights are high-powered and are prized for the high yield plants they produce. They are compact, energy-efficient, and long-lasting, and don’t give off a lot of heat. They are also easy to set up and have customizable grow light color spectrums. There are some drawbacks though – namely, LED lights can be more expensive and can cause light burn if they are kept too close to the plants.
- Starter-level LED: VIPARSPECTRA 450
- Advanced-level LED: VIPARSPECTRA 1200
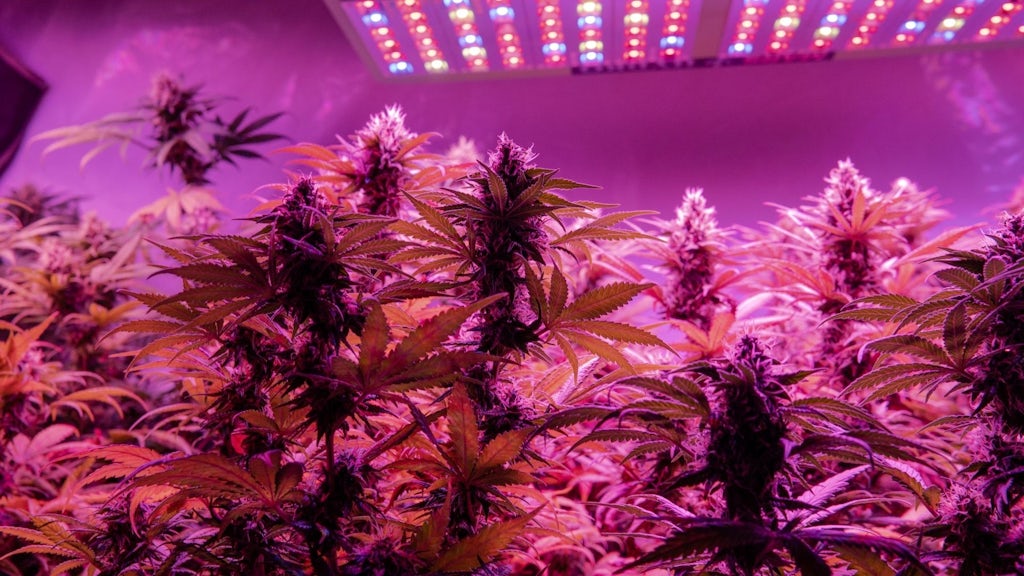
LEC (CMH) grow lights
LEC lights, also known as CMH (ceramic discharge metal halide) lights, produce a more natural light spectrum and more lumens per watt. These lights use a ceramic arc tube and tend to last much longer than most other lights. The more “natural” light produced by LECs can make it much easier to monitor the health of your plants, which can often correspond to changes in color, which can be harder to ascertain with the purple and yellow light caused by LED and HPS lights, respectively.
LEC lights can be used in both the vegetative and flowering stages, and it is believed that because they produce UV-B rays, the plants are likely to have increased trichome production. Two big drawbacks of LEC lights? They tend to produce more heat and cost significantly more than other lights.
- Our recommendation: Sun System LEC 315
Step 3: Choose a grow medium for your cannabis
For eons there was just soil and whatever nutrients the earth provided. Today though, you have a wealth of options when it comes to the medium you use to grow cannabis.
Soil:
The easiest option is the most time-honored one: natural, organic soil. This can be in the form of soil you have composted yourself or a store-bought soil that comes with nutrients included. We recommend the popular Fox Farms Ocean Forest soil mix that includes enough nutrients for your plant’s first month.
Soilless:
Non-soil mixtures are a popular method for growing cannabis, largely because your plants can grow quicker and with higher yields. Soilless mixes can also be less susceptible to pests and quite easy to maintain. One of the more popular mixes is coco coir, a fiber made from the outer husk of coconuts. Another option is perlite, which is a form of ground volcanic rock that can be mixed with coco coir, soil, or used on its own. A very popular coco coir mix is also the Coco Loco potting mix.
Hydroponic
Hydroponic cultivation entails growing plants using a mix of water and nutrients, without any base soil. Plants grown in a hydroponic setup typically grow faster and provide higher yields, with water and nutrients reaching the roots without having to make it through soil first.
Aeroponics
As the name may suggest, aeroponics is a growing method in which the plants are suspended in the air, and water and nutrients are delivered directly to the roots, typically with a fine mist. This is a method better suited to seasoned cannabis growers who can be quite meticulous and have the funds and time needed for setup. On the other hand, aeroponics grow quicker, use less water, and remove the threat of soil-based pests. They are also known for producing very high-quality buds.
Homemade soil vs premade mix – which is better?
The right soil can make a major difference in the health of your plant, and the quality of the cannabis you harvest. But is homemade soil or premade mixes better?
Making your own soil can be cheaper than buying, and is probably not as hard as you think. Homemade soil is loaded with nutrients and gives you the benefit of knowing everything that went into your soil. To make homemade soil, purchase an organic base soil and begin aerating it in a large container before adding organic matter such as compost, eggshells, coffee grounds, bone meal, and worm castings, to name just a few. You can also use your own compost if you have.
Premade “super soil” soil is store-bought composted soil that comes with a variety of organic nutrients and materials already mixed in. Premade soils can be a great option if you don’t have the time to make your own batch, or if you’re a little less confident in your ability to get all the ingredients right.
It’s ultimately a matter of preference and what your budget and schedule will allow.
Popular cannabis-friendly potting mix brands in the US:
- Fox Farms Ocean Forest soil mix (premium)
- Black Gold All Organic Potting Soil (good)
Step 4: Choose your cannabis nutrients
If you’re growing in soil, you’ll need to use cannabis-friendly nutrients that can enrich the soil during the vegetative stage, and which can be supplemented later on with added nutrients during the flowering stage. For soilless growers, use nutrients that are made specifically for soilless grows. You can also purchase nutrients that are specifically made for the soilless method you use.
One of the more popular nutrients is Dyna-Gro, which can work in any cannabis growing medium. Dyna-gro contains all 16 essential nutrients, and it is quite easy to use. There are various Dyna-gro formulations, and the company recommends using “Grow” (a 7-9-5 ratio mix) during the vegetative state, and the “BLOOM” formulation (a 3-12-6 ratio) “before your plants decide to shift into the flowering state.”
What is pH and why does it matter?
pH refers to the acidity or basicity of a liquid solution. Why does it matter? For cannabis, if the pH is too high (above 7, the pH of pure water) or too low (below 6), the plant can have trouble drawing nutrients. For hydroponic grows you’ll want to keep the pH even lower – between 5.5 and 6.5.
By closely monitoring the pH, you can stave off nutrient deficiencies, helping your plant grow faster and produce bigger yields. A simple pH monitor can make this a cinch.
Step 5: Choose your strain (and get seeds)
Deciding which cannabis strain to grow depends on a variety of factors that can be unique to each individual grower.
If it’s your first grow or you’re a relative novice, you may want to choose a strain that is considered easier to grow. Ease of cultivation refers to a number of variables including how resistant the strain is to disease, mold, mildew, and pests, as well as how much pruning it needs, how hardy and durable the plant is, and how much water and nutrients you need to give it.
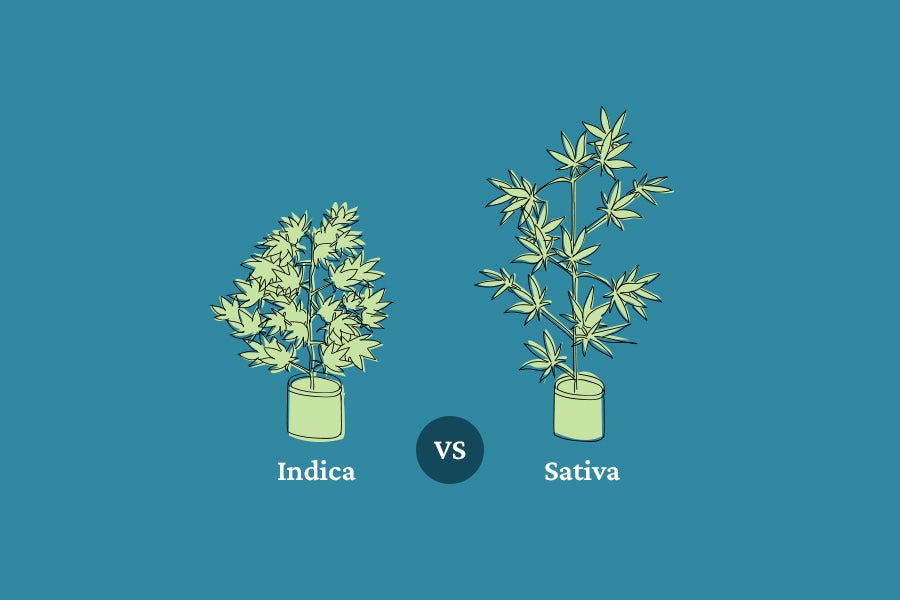
Depending on where you’re growing, you may prefer a strain that grows shorter and more like a shrub (typically this is the case with indica strains) as opposed to a tall, spread out strain that reaches well over two meters high (like many sativas). If you’re growing outdoors, the climate where you live will be an important factor in picking which strain you should grow.
Ultimately though, it depends on your goals as a cannabis grower. Are you looking for a high THC strain or one with a specific terpene profile? Do you want a low CBD strain? Are you looking for a strain that is commonly used to treat a specific medical condition? Also, how important is the size of the yield? Are you looking for a big harvest or just an easy to grow, no headache strain that provides a modest but still ample amount of weed?
A first-time grower may want to consider feminized or autoflowering seeds. Feminized seeds are almost certain to produce female plants, so that’s one less question mark to worry about. Autoflowering strains are from the Cannabis Ruderalis variety of the plant, which automatically flowers after maturing – and typically reaches harvest well before standard cannabis varieties. It’s also a very hardy, durable plant, though it tends to produce significantly smaller yields.
Consider your own goals as well as your experience when deciding which strain to grow, and then find a reputable online seed bank and research its best options.
How to grow marijuana with clones
You may not want to purchase seeds at all though, and instead, you may try growing with a clone. Clones are just that – female clones of female plants, which as a grower you will typically receive as a small sprout. They grow quicker than seeds because they have already germinated and sprouted, and are guaranteed to be female.
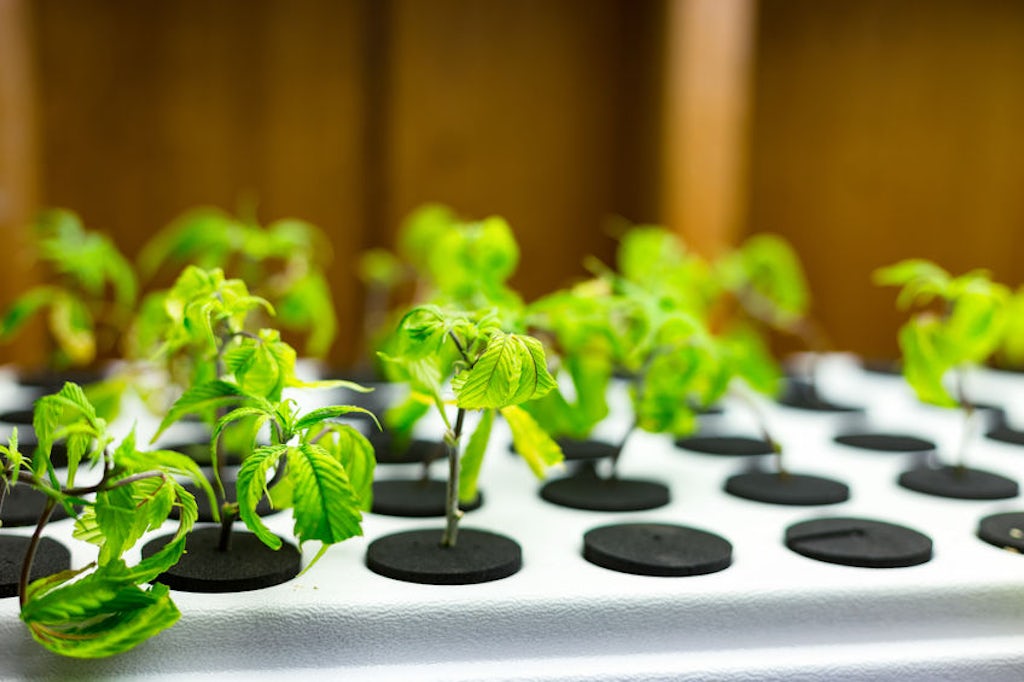
Clones do have some drawbacks though, they can be harder to come by and if you don’t know any cannabis growers in real life, then seeds are a much easier option. It can also be a bit tricky taking the clones from one location and planting them in your garden, and they will require extra care and sensitivity at first, especially if their roots have already sprouted.
How to grow marijuana with seeds
Growing with cannabis seeds is a more popular option and one that has been made much easier and more economical by the spread of online seed banks. If you find a trusted seed bank you can do your homework and find a strain that really suits your grow goals, and it’s a cinch to have them shipped to your house discretely and affordably.
With seeds, you have a number of options to make things easier, including the option of autoflowering or feminized seeds. Seeds can take a little longer than clones because you will still need to germinate them, plant them, and only then will they sprout. If you’ve found seeds in a bag of weed you can also try to plant that, though keep in mind, a healthy seed should be of good size and dark brown or light grey.
Another drawback of seeds is that unless you buy autoflowering or feminized seeds, it’s a bit of a gamble whether or not they’ll turn out to be female.
Step 6: How to germinate cannabis seeds
Picture a seed as a sort of hibernating plant waiting to sprout and grow forth towards the light. During the germination process, the seed sprouts and becomes a seedling, beginning the growth process. There are some very easy steps you can take to coax your seed through the germination process, which is of great importance to the success of your growth. By far the easiest way to germinate your cannabis seeds is to use a specialized rooting kit like Rapid Rooter. If you don’t want to spend the money, here are some tried and true methods to germinate your seeds.
Germinate in water
One of the most popular and simplest methods of germination is in water. Simply take a glass filled with room temperature water and drop your seeds into it. Replace the water every other day, and within a couple of days, you should see a small sprout emerge from the seed.
Germinate in soil
By germinating your seeds directly in the soil you remove the potentially tricky step of moving and/or transplanting the fragile seedling. Use a planting pot filled with a high-quality soil that has been soaked with water, and stick your finger about a half-inch into the soil. Place the seed directly in the hole, loosely cover it with soil, and within a few days, you should see a sprout. Gently remove the entire plant and surrounding soil and transplant it to where you plan to grow it.
Paper towel method
Another tried and true way to germinate is the paper towel method. Simply take a plate, place one or two paper towels (or cotton pads) on the plate, place your seed on top in the center, put another layer of paper towels on top, and moisten it with a spray bottle. Then place another plate or cover on top, and keep it in a rather cool place, around 70 degrees Fahrenheit. Within 2 to 5 days you should see a tiny root sticking out of the seeds, which you can then gently plant in your weed garden.
Step 7: The vegetative stage
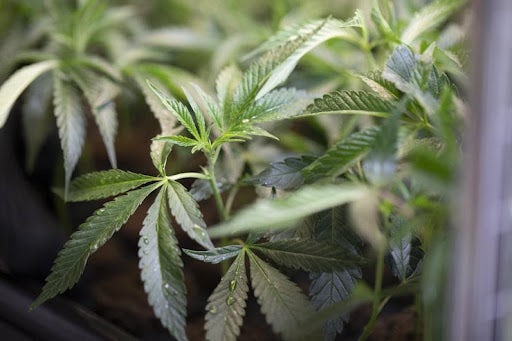
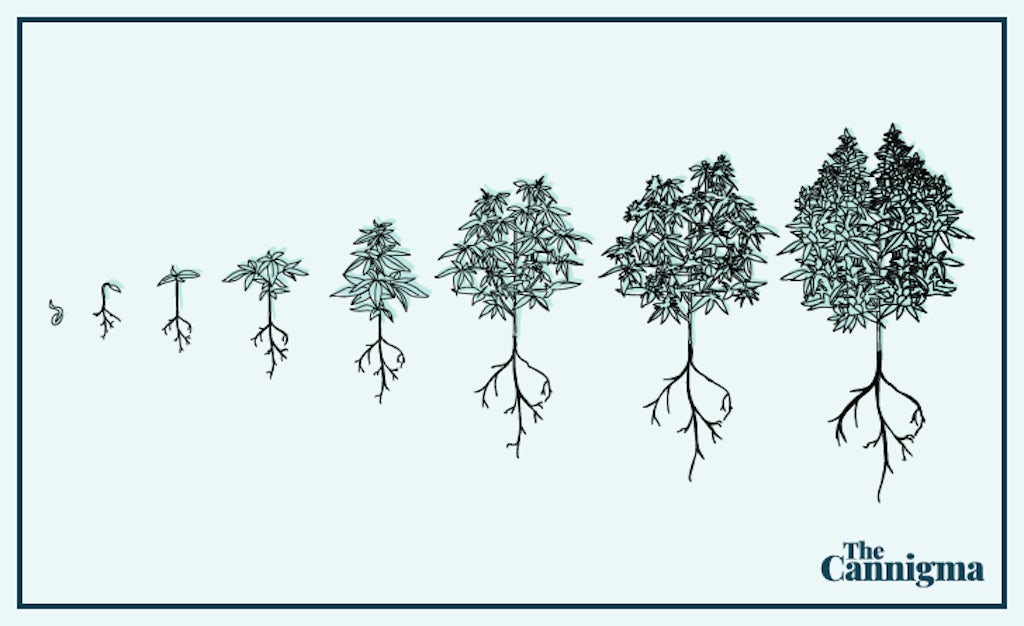
The first stage of your life as a cannabis parent (ok, a gardener/farmer) is what is known as the vegetative stage. This is the stage after the plant sprouts when it is devoting its energy to building the foundation necessary to become a full-grown plant. During this stage, the plant will only grow stems and roots, followed by leaves.
During the vegetative stage, the plant’s leaves will begin photosynthesis, as the plant continues to build up its root system and the stem structure that will support it until and through the flowering stage. Usually, the vegetative state lasts between 4 – 8 weeks.
The correct lighting schedule for the vegetative stage
The most common light schedule for indoor plants in the vegetative stage is an 18/6 schedule, meaning you will supply your plant with 18 uninterrupted hours of light and 6 hours of darkness. Other combinations of light and darkness (like 20/4, 19/5, 17/7) also work, as long as your plant doesn’t get more than 12 hours of darkness, as this will trigger the flowering stage. While more light equals stronger plants, there is a limit. Giving your plants too much light will stress them and raise the risk of turning them into hermaphrodites or showing other heat stress symptoms.
But which lighting schedule is better? There isn’t a single right or wrong answer. Turning off your lights for several hours each day will help save electricity and keep your grow area from getting too hot.
On the other hand, if you have a strain that thrives in warmer climates, then it may be better not to turn the lights off.
In any case, don’t rush your plant. By keeping it in the vegetative state a little longer, it will be more established by the time it flowers, and more likely to produce a larger yield.
It also depends on the seeds you use. If you’re growing autoflower seeds, then you should keep them in the 18-24 hours of light range all the way until harvest.
No matter how long your vegetative state, you’re going to want to water the plants whenever the soil feels dry up till about an inch deep, allowing the water to drain fully. Continue to closely monitor the temperature and humidity in your grow room, as well as the nutrients schedule of your plants.
Training techniques
In any size cannabis grow, “training” your plants can help optimize the size and quality of your yield.
Without training, cannabis plants tend to grow vertically producing one main central “cola.” By manipulating how the plant grows, training can create several main colas, spreading the main bud-growing among several sites on the plant, which can significantly increase your yield.
There are two main types of training methods – LST (low stress) and HST (high stress).
With low-stress training, you bend tall stems away from the center of the plant early in the vegetative stage, when the plant is still a seedling. This “flattens” out the plant, allowing it to form a number of main colas at roughly the same height.
High-stress training methods involve more direct, severe, and immediate steps. Basically, they involve targeted pruning in order to spur increased growth. These methods include “topping,” which entails removing the top of a seedling’s main stem, which splits it into two main stems. This creates multiple main colas instead of just the central one.
Throughout the vegetative stage, you can top the high branches as well as the ones around the side of the plant, which will create more branches and cause the plant to become bushier and produce more buds.
The Sea of Green Method (SOG)
Strength in numbers is the principle behind the Sea of Green (SOG) method, which involves growing a large number of small plants instead of a few larger ones.
In the SOG method, you grow more plants per square foot with a short vegetative stage. You won’t need to top the plants and you should be able to get high yields with a quicker turnout while making more efficient use of your grown space. It can also keep your energy expenses lower.
Typically the SOG method works best with strains that grow shorter and more shrublike, and by keeping the vegetative state shorter, around 2-3 weeks at most before entering the flowering stage.
The Screen of Green Method (SCROG)
The Screen of Green Method (SCROG) is used to create a canopy of sorts of uniform height across an entire grow room of plants.
When growing with the SCROG method, a grower places a screen above the plants, and then manipulates the branches as they grow, spreading them through the mesh screen so they grow horizontally instead of expending their energy vertically.
By growing horizontally, the buds can receive more light exposure, evenly across the surface of the canopy. It should also lead to higher yields and can help you make better, more efficient use of a small growing space, much like the SOG method.
What is Super Cropping?
A high-stress technique that might not be for the faint of heart, super cropping involves squeezing and bending branches, leaving them hanging down at a 90-degree angle. This allows the rest of the plant to receive more sunlight and causes the plant to produce more trichomes as a defense method against attack. This also spurs the plant to take in more nutrients, boosting growth further.
It can also lead your plant to produce new colas and leaves.
Lollipopping
Lollipopping is a growing technique that kinda looks like how it sounds. Basically, it involves shifting the plant’s energy, growth, and effort from the areas at the bottom of the plant that aren’t seeing light, to the higher parts of the plant which are exposed to your full lighting system.
With the bottom leaves and buds blocked from the light, the plant will expend energy on growth of little consequence. By lollipopping, you prune away the lower buds and leaves, forcing the plant to focus its energy on the high yield bud producing sites higher up on the plant.
Also, by pruning away the lower leaves and buds, you can increase the airflow around your plant, helping keep humidity at bay.
The Tie-down-method (a.k.a. mainlining)
Also known as “mainlining,” the tie-down method is a way of training cannabis to grow several large colas of the same size, instead of a single large central cola. This is done by creating a y-shaped hub or manifold in the main stem so that each branch starts from this same point. As a result, each bud will be the same distance from the roots, and thus, should grow to the same size across an even canopy. The technique is also meant, like lollipopping, to keep the plant from wasting energy on developing smaller buds towards the bottom of the branches.
Step 8: The flowering stage
The second major phase in the life of a cannabis plant is the flowering stage. This is the stage when the plant begins growing the buds that will eventually be harvested and consumed – or when you’ll determine that your plant is male or hermaphrodite.
When a plant enters the flowering stage, it starts putting its energy into producing buds, after first making sure to grow more stems and leaves to support them – what is known as the “stretch phase” or “transition phase.”
There are actually several stages during flowering, which can change from week to week. After the initial “stretch phase,” plants in their third week of flowering will start producing buds at the point where the main stem and branches meet – what are known as “nodes.”
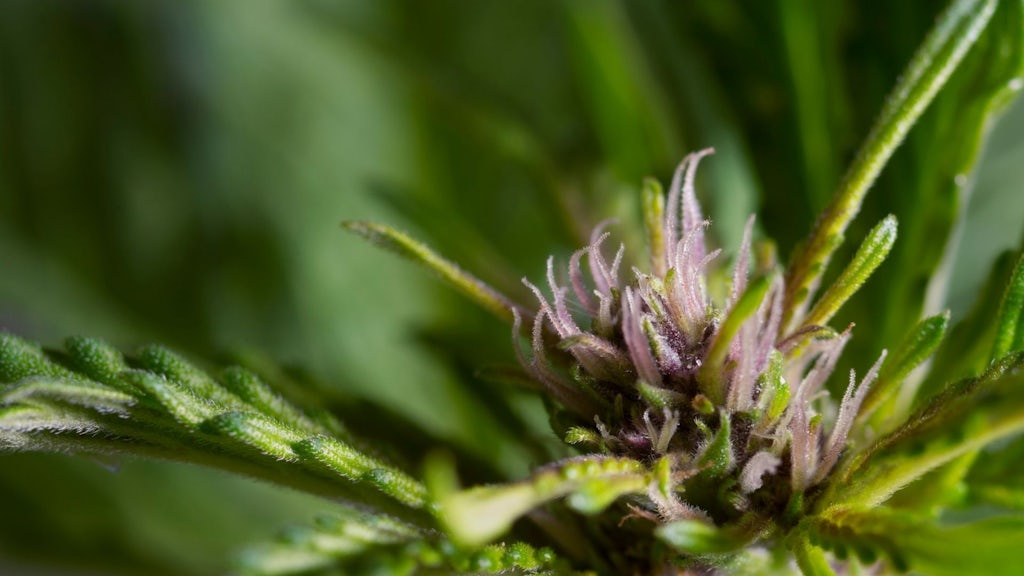
The next week is the mid-flowering stage, during which the plant fully shifts its focus towards bud growing, followed a week or so later by the late flowering or “ripening” phase, which carries through till harvest. During the final stage, you’ll see your plant develop the large, sticky – and pungent – buds that you waited for.
In the final two weeks before harvest, it is highly recommended that growers “flush” the soil with water only, in order to wash out salt and nutrients the plant doesn’t need, and which you don’t want in the buds you harvest. Flushing the plants will improve the taste and aroma of your crop, so it’s worth taking the time to do so.
During the flowering stage, your plants may need even more attention than during the vegetative stage. You’ll need to keep a close eye on the temperature, humidity, and ventilation in order to stave off menaces like bud rot, mold, and mildew, and also make sure that your plant is getting enough water and nutrients.
When to enter the flowering stage
During outdoor grows, the flowering stage begins in accordance with the natural rhythm of the seasons when the days become shorter around the time Autumn begins in October. Indoors, plants will enter the flowering stage when their photoperiod changes from 18-24 hours of light per day to 12 hours light, 12 hours of dark per day.
Deciding when to move your plants from the vegetative stage to the flowering stage is a bit of a balancing act – too soon and you may end up with a smaller yield, too long and you may have buds that start growing too large and too close to the lights.
The amount of time it takes for your plant to grow sturdy enough to focus on flowering can depend on factors including the strain in question, the nutrients it was given, and the lights used. If you are confident that your plants are sturdy and strong enough to flower, then it’s time to trigger the flowering stage. Keep in mind that there is no general answer to this question, but common practice is to wait at least 60 days before flowering your plant. This will give you enough time to make sure your plant is healthy and well-developed. It also gives you time to correct any mistakes you may have made, as this will be much harder to do during the flowering stage. If you’re short on space and can’t let your plant get any bigger, or if maximizing yield is not an issue, you can always start the flowering stage as early as needed.
Lighting schedule
To “trigger” the flowering stage, indoor growers can alter their light schedule to mimic the day’s natural split between day and night. By switching to 12 hours light, 12 hours dark, growers can simulate night time, sending a message to the plants that the seasons have changed and it’s time to focus on baby (bud) making.
This requires careful attention to a precise lighting schedule, including 12 uninterrupted hours of total darkness per day. Even a few seconds of light can harm their flowering, or even cause them to become hermaphrodites.
If you are using autoflower seeds, they will enter the flowering stage without any need to manipulate the light cycle.
The gender reveal – separating males from females
One of the more potentially tricky aspects of the flowering stage is “the gender reveal” – determining if the plants will be female, male, or hermaphrodite. Keep a close eye on the nodes to make sure you don’t see any pollen sacs, which indicate either a male plant or a hermaphrodite – a female plant that also produces pollen sacs.
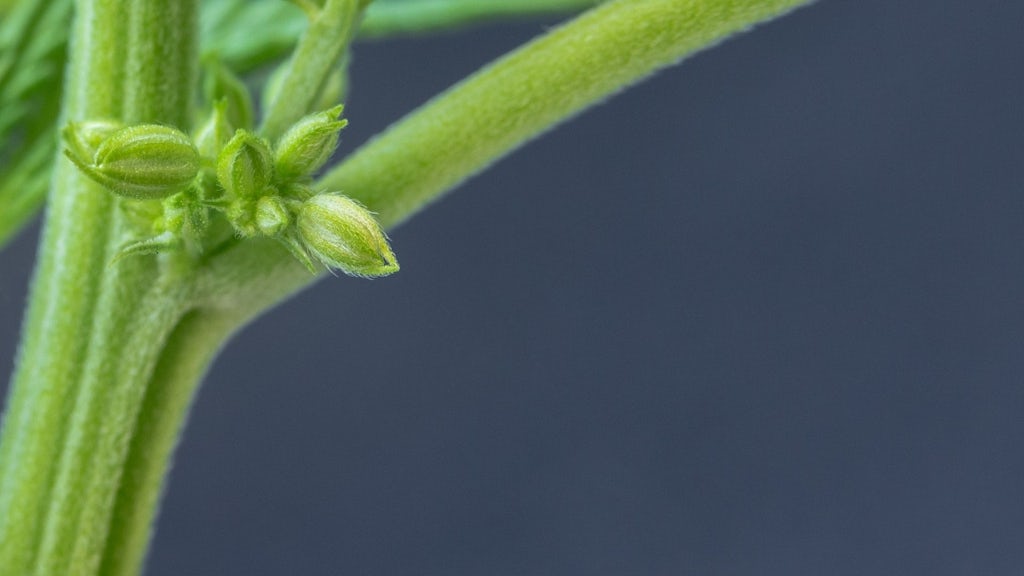
Make sure to remove these plants and pollen sacs so they do not pollinate the other plants in your garden.
You can actually tell during the vegetative state which sex your plant will be, by looking out for “pre-flowers” that grow at the base of the leaves around the 4th week or so. Male pre-flowers tend to be squat and bulbous, often described as akin to a spade in a suit of cards. Female pre-flowers are usually longer and thinner and are often described as more pearlike in shape. A more tell-tale sign will be the white pistils (hairs) that usually protrude from the top of female pre-flowers.
Step 9: Harvest your marijuana
The moment you’ve been waiting for – the time has come to enjoy your first cannabis harvest. But how do you know when the plants are ready?
When is cannabis ready to be harvested?
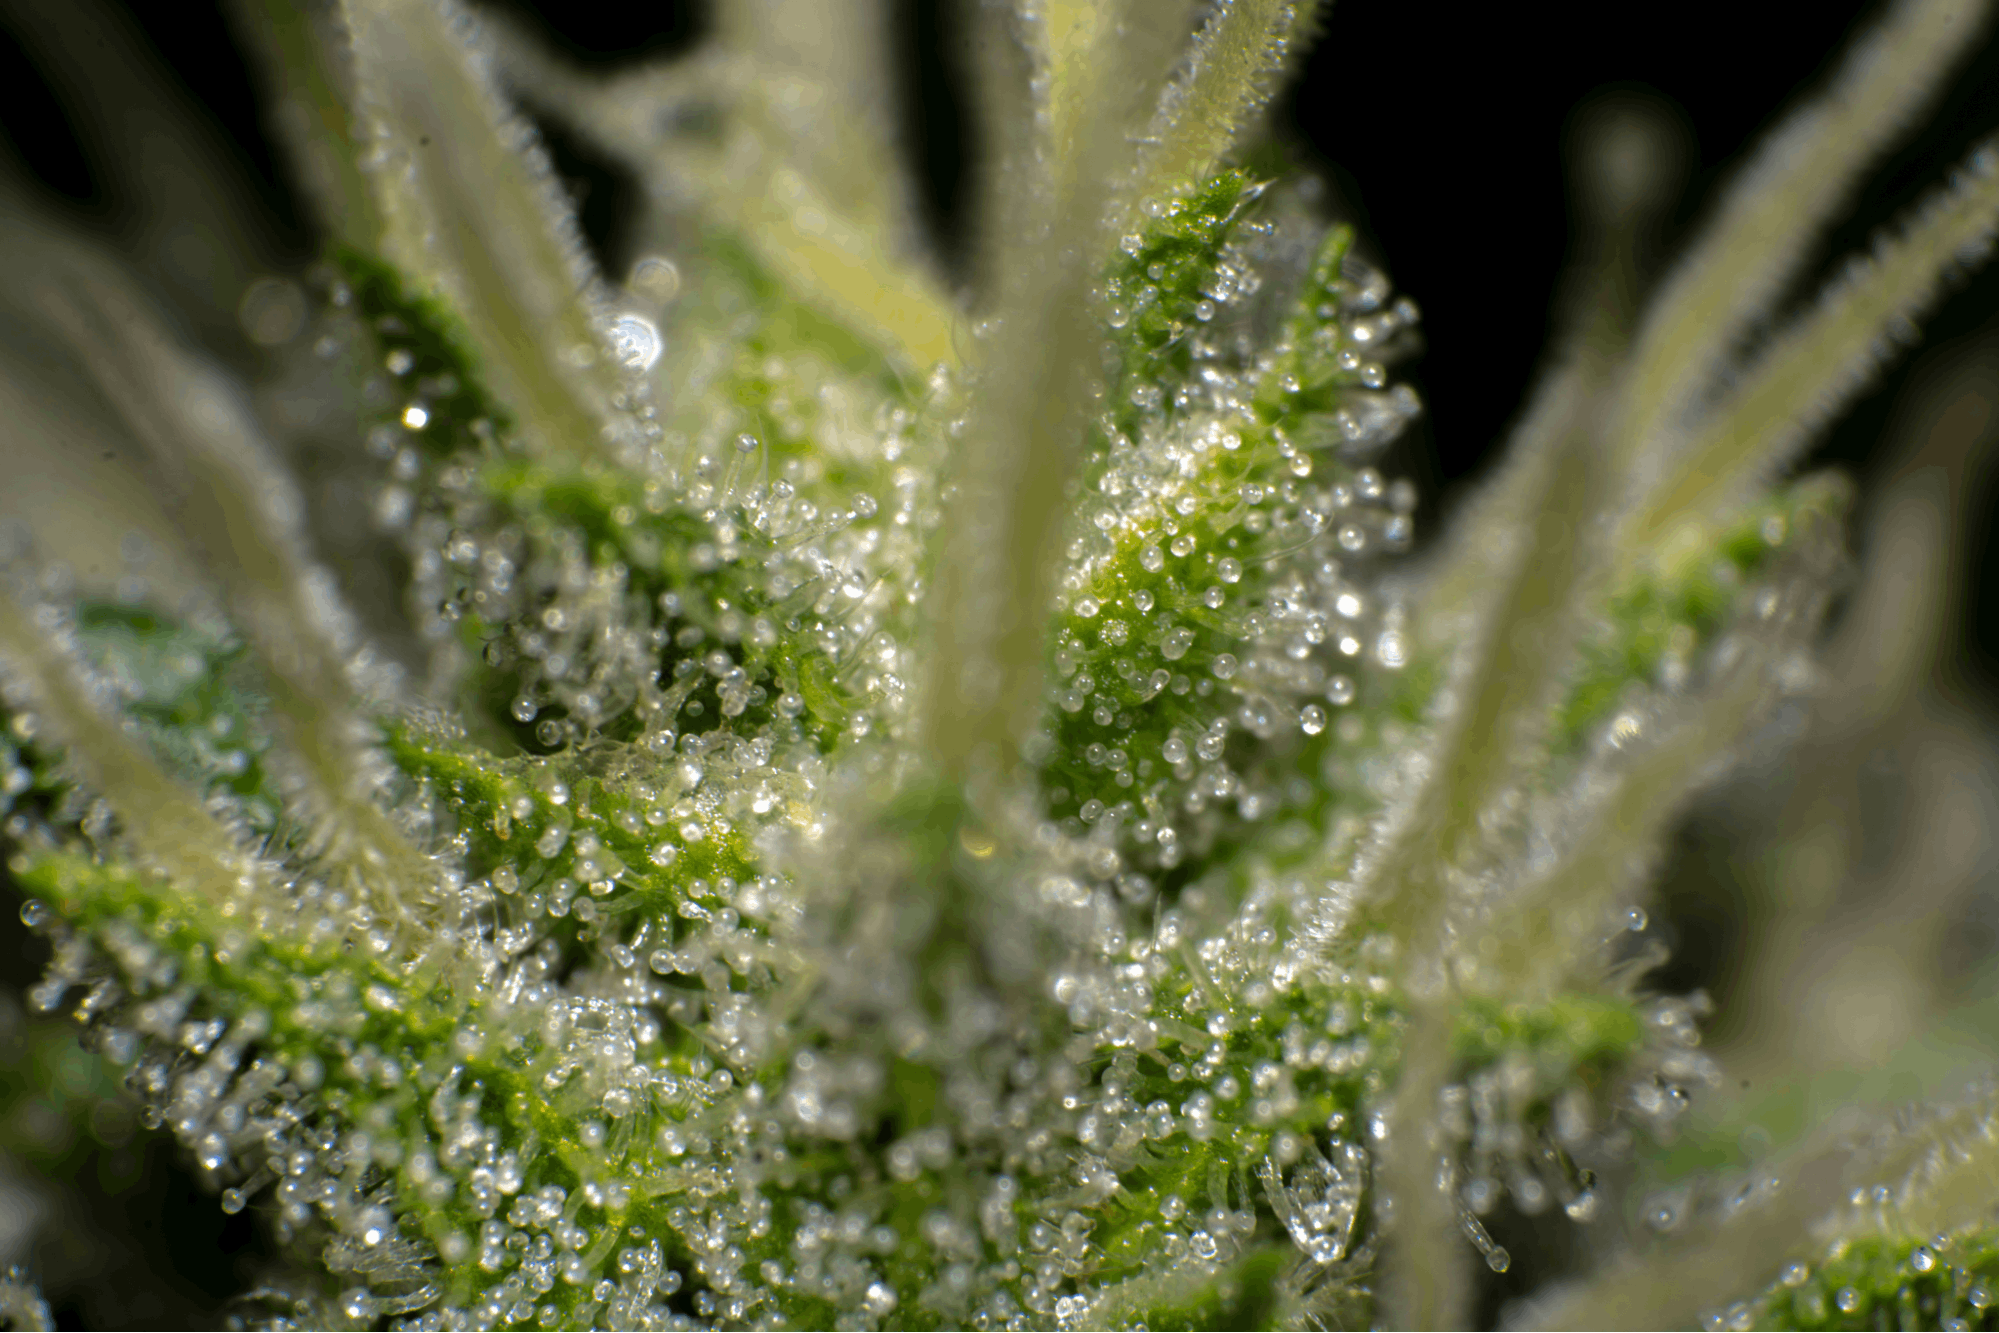
The presence of large, well or even over-developed buds is a good sign that you may be ready for harvest, but you can also look closer at the hairs (pistils) on the buds – if at least half of them are dark and curled and the plant’s trichomes have become mostly cloud/milky white with a large amount of amber-hued trichomes – then harvest time is upon you. If you wait until around 70-90% of the pistils have darkened, then your plant should be at its optimal potency.
If the pistols are still white and are not curled – then you still have some time to go.
You may also notice some of the leaves turning yellow and curling, or that the branches are hanging under the stress of the swollen buds.
Harvesting too soon can mean you end up with buds that have not reached their full potency, or are too “racy” in the effect they produce. Waiting too long can mean potent weed that produces a sedating effect that may not be to your liking.
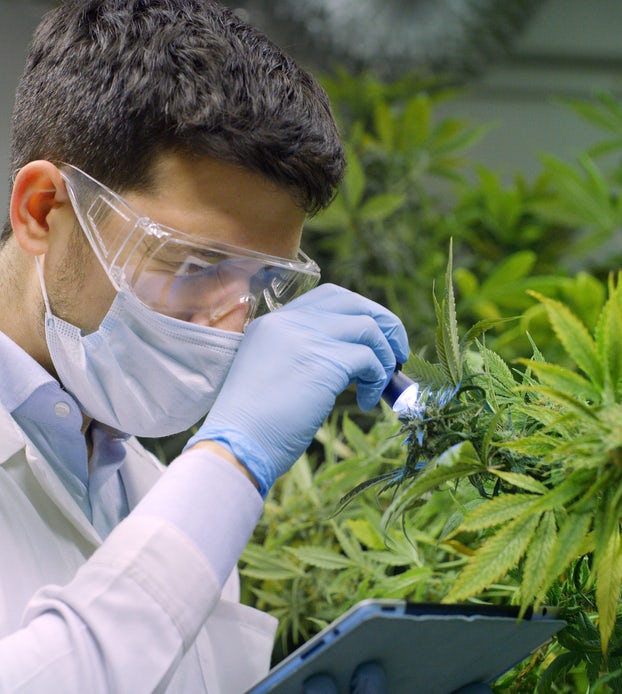
Your best bet is to be patient and pay close attention to these visual clothes. A handy magnifying lens or jeweler’s loupe and a smartphone camera can make this step a lot easier.
How to harvest your cannabis?
There isn’t a single right answer for how to harvest – some growers may chop down the whole plant while others may stagger their harvest, first cutting the main cola or specific branches first, while others continue to develop as needed.
If you’re satisfied with your indoor grow your first step should be to remove the lighting and then run a line across the top of your room. Remove the plant at its base and secure several large branches upside down on the line you just hung.
Step 10: Dry, trim and cure your harvest
Three of the more important steps of the cannabis cultivation process actually take place after harvest – drying, curing, and trimming.
How to dry your cannabis
Drying cannabis is an essential step after harvest because it removes the moisture, improving the flavor and aroma, and producing a smoother smoke. It also gets rid of the chlorophyll in the plant, helping bring out the terpene profile and rid the buds of that overly grassy, inside of a lawnmower bag flavor.
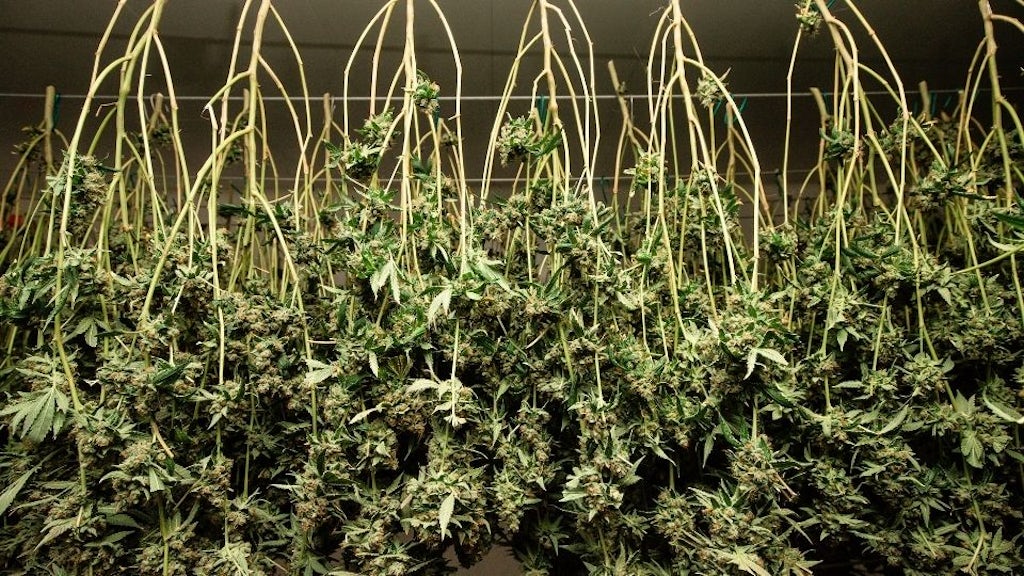
When drying, keep the room well ventilated, making sure that the buds are not touching and that they can get air on all sides. Keep the temperature in the room around 70°F (21°C) with 50% humidity.
Within around 4 to 10 days your buds should be properly dried, and a solid way to check if to see if small stems crack easily when you bend them, but don’t quite break yet. Also, make sure to look at the buds themselves and gauge how dry they’ve become.
How to trim your cannabis
Trimming buds helps give them that picture-perfect, centerfold appearance, free of any twisty leaves and given an immaculate, well-trimmed facade.
Trimming your buds can be done either before drying them or after the drying process. Before drying – what is known as “wet trimming” – can be easier as the buds are still rather moist, and you’re less likely to knock much resin off the buds. In both cases, growers tend to remove the large fan leaves before drying.
Wet trimming can also help prevent mold and take less time to dry. Dry trimming often creates more dense buds, though trichomes may be more likely to fall off after the buds have become dry.
When trimming, cut off the stems and remove the fan leaves by hand. With the trichome rich sugar leaves, you can choose to leave them on the buds if they aren’t sticking out too far, though this may produce a harsher smoke. Trimming can be a long, deliberate process, so consider throwing on some music or a podcast. And if you don’t manage to finish everything in one sitting, you can always bag up the untrimmed herb so it doesn’t continue drying, and come back to them later.
To trim you’re going to need a number of tools including heavy-duty sharp scissors, ideally ones with a spring that automatically reloads after every snip to make things easier on your wrists. Pruning shears are a great option when cutting branches during harvest and trim.
You should definitely wear gloves to keep your hands from getting too sticky from resin – which can be notably hard to wash off.
On your trimming table, make sure to have a few large trays set up to catch your trim, as well as the prepared buds. And while you may be tempted to toss out the trim or the “kief” that falls off the buds, you can actually put it to great use in making concentrates.
How to cure your cannabis
Another essential step is curing your weed. Curing your buds improves the taste of the weed, removing that “front lawn clippings” flavor and helps produce a smoother smoke and a more potent – yet more mellow and chill high.
Properly cured buds also have a longer shelf life and are less likely to develop mold or mildew.
To cure your buds, first dry them as explained above and put them in large mason jars (quart-sized) for between 2 to 4 weeks, in a room that’s around 70°F (21°C) with about 60-65% humidity. Make sure not to cram the buds into the jar, which should be only about ¾ full, with some room left at the top.
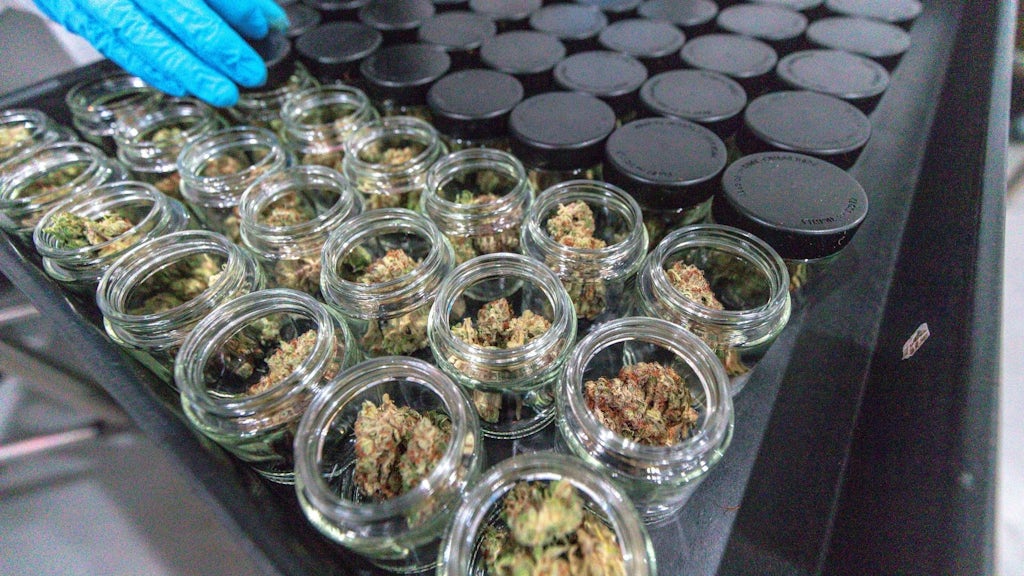
Make sure to open the jars and check the buds a couple of times per day during the first few days, to gauge their moistness and to make sure they get fresh air. For the remainder of the first two weeks, check the buds once a day, opening the jar to let fresh air in.
Keep this process up for about four weeks. Gradually you will notice the aroma change from lawn clippings to high-grade cannabis. By the third or fourth week, you can open the jars once a week or so, and if you no longer see the cannabis sweat on the inside of the jar, then you should be ready to smoke.
Tips for proper storage
The best method for properly storing your cannabis is to make sure it’s well dried and cured, to begin with. After those crucial steps, your best bet is to find some airtight mason jars. Avoid plastic containers or plastic bags, and don’t keep your weed in the refrigerator or freezer.
Once your cannabis is in airtight glass jars, make sure to stash them away in a cool, dark place in your house, where they won’t be damaged by light, heat, or humidity.
Sign up for bi-weekly updates, packed full of cannabis education, recipes, and tips. Your inbox will love it.

 Shop
Shop Support
